Wednesday 27 February 2013

Exercising at Home


Park Bench Workout Routine
We have to leave our routines and work out! Come on!

How to make a Chalkboard

Here is a good idea to entertain kids, they will love it. Other use for it can be a message board where you write home tasks. Think about it! By the way, I found this idea in http://www.salttree.net/2011/08/make-it-chalkboard-paint.html, feel free to visit it, you will enjoy it as much as I did!

"Yes you can.  Chalkboard paint is ridiculously easy to make.  The great thing about making it yourself is the array of colours you can make it in!  Do a small project like a message board or go big and turn your kids play room into one big chalkboard!  Ohhhhh... all the kids from the neighbourhood would surely be over if that were the case!  Follow along for the recipe and some tips!


1 Cup of latex house paint or acrylic craft paint
1 TBSP of non-sanded tile grout

Mix together until there are no lumps.

Yes.  That's it.


Paint your surface with the mixture.  I advise using a small roller for a smoother finish.  A brush will give you some textured ridges when it dries (I used a brush).

Let it dry completely.


Get some chalk.  'Sidewalk' chalk has great, vibrant colours.  I wish I'd had some for the pics!


Draw!  Yep.  That easy.


And just in case you were wondering... clean up is no problem.  I used a damp cloth and that was it.

I popped my chalkboard into an old frame I had.  If you do a small project like I did, you could even paint the reverse side of the board in a different colour for days you want a change.  I'm thinking.... sunny yellow for mine :)


Have fun!"

Decorations

Let leaves soak in Arm and Hammer Washingu Soda for a few days, then take a brush and lightly brush off the..leaf coat (?) And you have Translucent leaves!Menu board, love it.  Hubbs can pick things from the pocket to help decide for the week.
Love it, i think it would work really well like a task manager!
staple a shower curtain to a wooden frame for inexpensive large scale artwork.
Today I'm in a decorations mood! What do you think about this ones?

Monday 25 February 2013

DIY Painted Couch


"Do you have an old couch that’s well beyond the point of cleaning?
We did:
IMG_0115
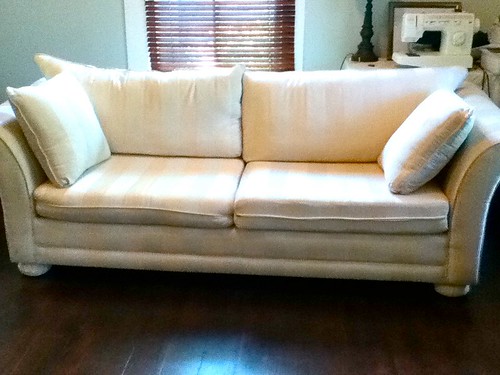
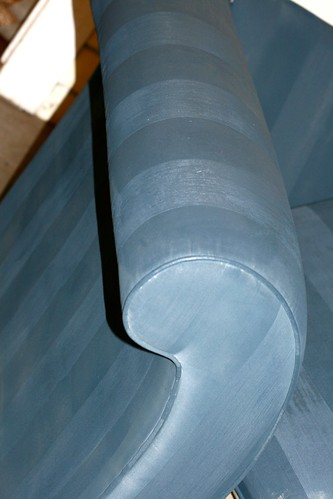
That picture almost makes it look pretty, but here’s what it really looked like:
IMG_5751
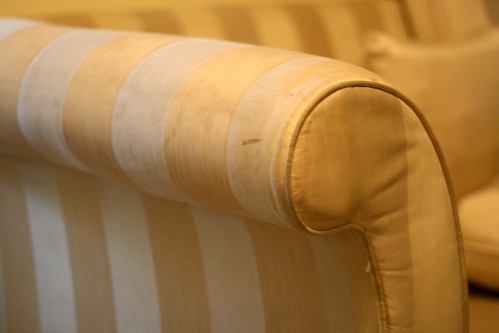
It was big, and after months of sitting in our back room, I had no desire to take on the huge project of reupholstering it. I bought it intending to do just that, but I needed about 16-18 yards of fabric to complete the job, and I knew deep down in my heart I would buy all that fabric and never finish it {do you ever just know it’s not in you? lol!}.  So I was stuck with a couch that I couldn’t sell.
One late night as I was in bed trying to fall asleep, I was thinking of all the things I needed to do {including doing something with the couch!} and I remembered I had some of this needing to be used:
IMG_5750
and being the crazy DIY’er that I am, I jumped out of bed and found it and started painting my couch cushion. Yes, I am that weird! After I painted one side of a cushion, I went back to bed, and couldn’t fall asleep I was so excited. {even weirder, I know! ;) }
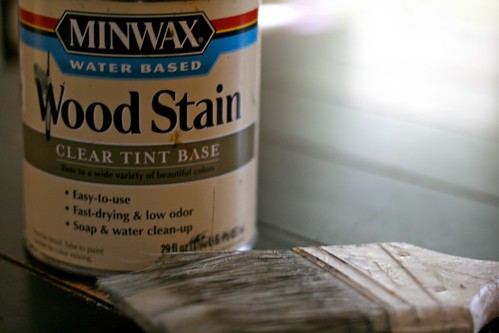
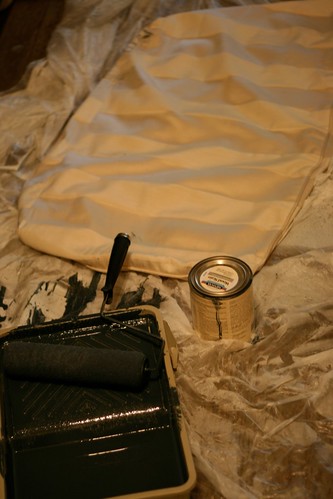
I’d read that painting furniture had lots of disadvantages like scratching, peeling, stiffness, etc., so I was super excited to try this liquid water-based stain instead of paint. It doesn’t have the same protective coating as paint since it’s just stain for wood projects, so I was hoping that would give it a softer finish and let it really soak into the upholstery.
IMG_5754
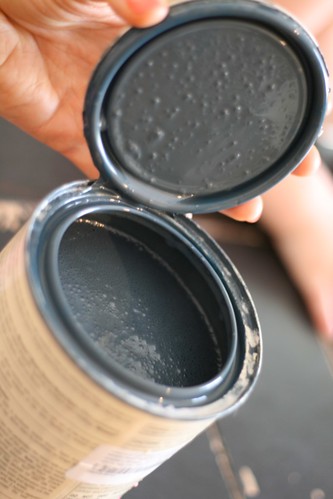
{oh, and you can get Minwax brand water-based stain tinted in any of these colors- I had the Charcoal Gray on hand for a table project, but I can totally see using any of the others too! I can’t wait to try another color!}
colors
The test cushion did very, very well, and I was so stoked, the next day I went for it. Yep. I wood-stained my big old cream couch Charcoal Gray. I started by giving it a good wipe down to clean off any surface dirt, then I just started painting the stain on it.
IMG_5758
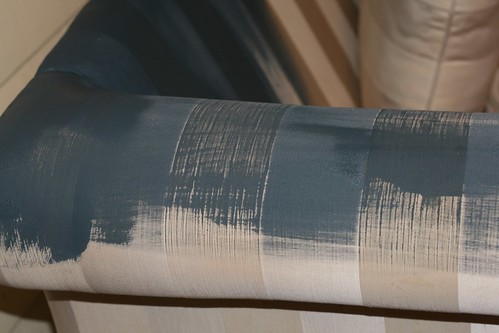
It went right on- all you have to do is shake, open, and start painting. You’ll want to make sure you paint or roll with the grain of the fabric.
IMG_5760
I was really happy with how one coat did:
IMG_5770
IMG_5769


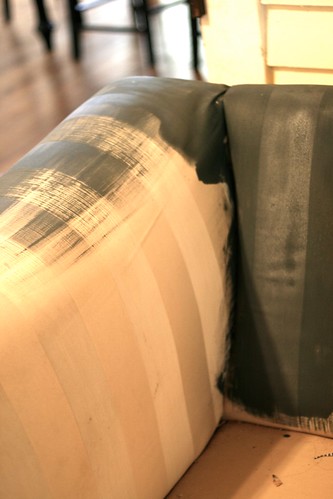
The only downside for me was how much stain the whole couch took. I used a can per every 7-8 square feet. And the cans were around $10 each, so I ended up spending about $70 to cover it from top to bottom with two coats. The padding seemed to absorb the stain quite a bit on the arms and back of the seats.
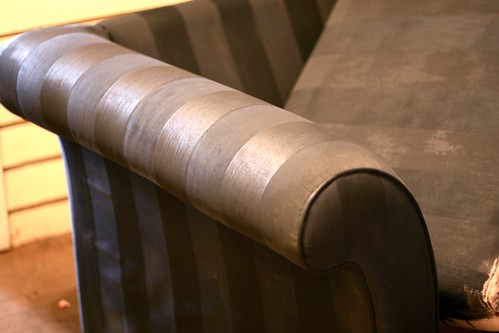
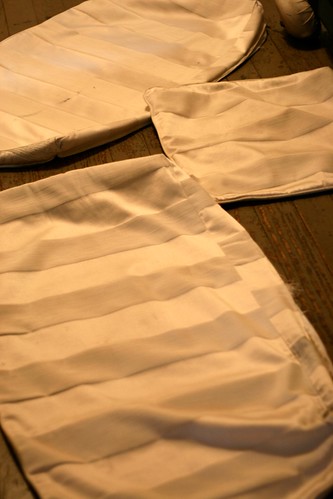
If you have the ability to remove your cushion covers like this, I would totally recommend it. The stain went much farther when I did:
IMG_6302IMG_6306


Painting the whole couch twice took me around 5-6 hours, and I redid the pillows by seam ripping the cushion covers and using the original as a pattern for the new ones, then sewed  the new pillow covers to match the new gray color. {that’s a post all of it’s own!}
I ended up with this sweet little lady about 15 hours of work and close to $100 later:
IMG_7692

couch copy
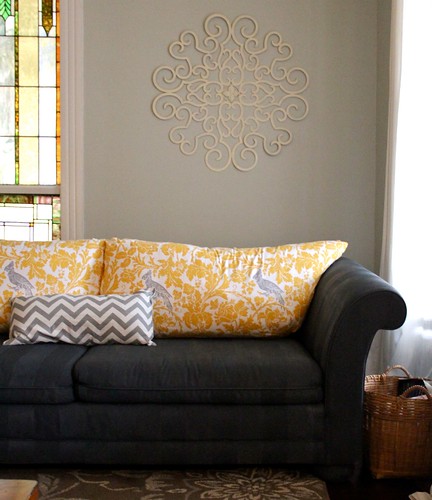
I love it. The picture above was taken after 6 weeks of use, and I’m still a huge fan of the stain method. It's definitely stiffer than it was before, but you don’t notice because the back cushions are so soft and cushy.  It’s nearly waterproof, and anything you spill wipes right off.  I love the fact that my four little kids can’t destroy it. :D It’s been wearing very well, but I still kept my leftover stain in case I wanted to touch it up.
Everyone who saw it couldn’t believe it wasn’t the original couch color- they thought it was a whole new couch, and were completely surprised that I had treated it to make it gray! I totally loved that! :)
Two things I don’t like as much about the painting/staining method:
the high investment it took to redo it which I noted before, and the fact that the cushions wrinkle more than they did with the original fabric. I didn’t even notice it really until I started inspecting it the other day. It’s also dries a little shinier than regular fabric I think.
Even with all of it’s imperfections, I’m so, so excited to give it a funky brand new look! It’s so much more fun to have an adorable gray and yellow bird couch instead of a icky cream one! :D
Supplies you’ll need:
a good paintbrush and/or roller
floor covering
Minwax water-based stain tinted to your color
{how much you need will vary depending on your project, but one couch took 7-8 cans for me.}
Instructions:
1. prep your area and wipe off any surface dirt from your furniture
2. shake your stain very well
3. pour in your paint pan
4. start painting with the grain of your fabric {be gentle- it’ll splash easily!}
5. let each coat dry to the touch
6. like walls, when you can’t see the original fabric color at all, you’re done
7. enjoy your brand new furniture without having to reupholster!
*results may vary, so try this at your own risk! as with all DIY projects, we are not experts so of course, any particular method or outcome is not guaranteed or necessarily deemed safe or reliable. We’re just using the resources we have to make something old look new again. :) Good luck, and let me know how it goes if  you try it!"
 
Check out where I found this amazing idea but really crazy! Would you be capable of it? Let me know! By the way, DIY is Do It Yourself! =) http://biblicalhomemaking.blogspot.pt/2012/01/how-to-paint-furniture-upholstery-diy.html

Homemade Herbarium


"The C.M. Barker covered knitting box made me think of this herbarium I made for my daughter some years ago. This is really the easiest thing to make, but here's a little how-to. It makes a great gift for a little friend as summer is approaching."


"You'll need:
  • two heavy pieces of cardboard about A4 size 
  • decorative paper/cut outs or the like
  • glue stick
  • Stanley (or other sharp) knife
  • satin ribbon
  • contact paper"


"First, cut your cardboard to two A4 sized pieces, or a different size of your choice. You will make two identical pieces; the front and the back.
Make 4 small cuts to each piece (see photo). This will be where the ribbon will go. The ribbon is used to tie the herbarium  together.
Decorate as desired. I chose to glue pretty paper to one side of the cardboard (using glue stick), just wrapping around the corners, and some heavy white paper to the other side, which hid the corner folds.
Cover both cardboards with transparent contact paper, making sure that every fold is neatly done. Cover both sides. This is to protect your herbarium from moist.
Find the four cuts you made with your fingers (easy, as the cutting will leave textured 'wounds' that you will feel through the paper), and cut through the contact paper and decorative paper as well. The reason why I do this in two steps is that it will look much better, with minimal 'cut wounds'." 


"Use the tip of your knife to push the ribbon through the cuts. 'Weave' the ribbon in and out of the cuts as shown, thus connecting the two cardboard pieces. Look closely at picture no. two, and you'll see the ribbon that constitutes the back of the herbarium. It's not glued or fastened to the cardboard in any other way, as it's meant to expand with the content of the herbarium - so make sure you cut the ribbons  long enough!
Place 10 - 20 pieces of heavy paper inside (grainy paper texture is better than smooth), fold, tie the ribbon - you're done. The rest is up to the lucky recipient!"


"Here's a picture of the prototype I made (which of course ended up being my daughters' - 'the pretty ones' are always leaving our home as gifts, like the knitting box. She thinks it's bloody unfair. I agree.)"


"When you attach your pressed flowers, do not cover the whole page with contact paper (as I was taught at school when I was a child) - use only small pieces of transparent tape or contact paper and fasten here and there. Or else, the whole flower will soon turn brown."


This idea came from http://earthandliving.blogspot.pt/2010/05/homemade-herbarium.html , which I really encourage you to visit cause there are just amazing things to do and see.

Sunday 24 February 2013

How To Make a Sewing Suitcase


"Remember the suitcase I made for my daughter for x-mas?
I thought I'd show how to, as I had the pleasure of making one more for my girls' best friends birthday.

I bought the ready made cardboard suitcase at a craft store and decorated it using decoupage - I used a big piece of Cicely Mary Barker gift paper. It was quite thin, so it might originally have been intended for decoupage. I hadn't done much decoupage before, and wasn't quite happy with it. All the tiny curves and corners, the glue that left white stains on the metal lock, but most of all, how the glue made the lid of the suitcase slightly bend. But all in all, the result was good.

In this box I've put two pieces of linen for embriodery (I had previously given the girl an embroidery hoop), a woollen pencil case filled with embroidery thread, and two balls of wool yarn. In the lid (an extra piece of cardboard glued on to the proper lid) I made room for scissors, measuring tape, a pair of knitting needles and a crochet needle. I also sewed up a tiny needle book.

You'll need (the pictures are pretty self explanatory, but just in case):
A cardboard suitcase
Decoupage paper or the like and glue for decoration (if you like, that is - the one I made for my daughter had very little decoration)
Gluegun (cheap, fast and super efficient)
Elastic band, about 1/2 cm wide (1/4 inch)
Stuff to go inside the box - knitting, sewing or other craft stuff
A piece of cardboard to make up the inner lid. It should be sturdy but thin - it must be able to hold the tools and the glue that fastens it to the suitcase lid (gluegun type), but you don't want it to take up too much space inside the lid.


Start by decorating the box as you please, then move on to the real work; the inner lid. I decorated this one with a single cut out - a fairy sewing tansy buttons on to a shirt (pretty pleased with that one, I admit!)
Cut the cardboard to fit inside the suitcase lid. Easiest way to do this is to place the suitcase lid on top of the cardboard and draw around the edge, then cut off a bit to make it fit inside.
Place the tools you want attached to the lid in a manner so that they fit together, making a visual before you start cutting.
Mark with a pencil where you want the elastic bands to go. Keep in mind that you'd rather want the bands to be tight than loose, or else your scissor/measuring tape/what have you might fall out.


Cut slits for the elastic band with a Stanley knife. Cutting from the right side will make a prettier result.
Push the band through. This photo shows my 'scissor band'; where the scissor will be.
Photo below shows the back.


Do the same for the rest of the tools - here you see my 'knitting needle band'.


Photo above shows the back.
Turn the lid around, backside facing up, and glue one end to it using a glue gun. 


Place the tool in question underneath the band, tighten, and glue the other end to the back. Cut off excess band.


With the needles, I didn't glue the 'inbetween band' to the back. The band is sufficiently tight to hold the needles in place.
Remove the tools and glue the inner lid to the suitcase lid, again using the glue gun.


Put the tools back in place, fill the box with crafty goodies, take a step back and admire your work!


See the teeny tiny basket with the teeny tiny scissor and thread? :)"

I found this sewing suitcase idea in http://earthandliving.blogspot.pt/2010/04/how-to-make-knittingsewing-suitcase.html . Visit that blog, is amazing, there are a wide range of ideas that I am sure you will enjoy.

Saturday 23 February 2013

To start another blog or not to start another blog?

I wanted to make this blog literaly to amaze you so today I'm showing to you one of my biggest lovers : Cooking! I just love to cook, it´s amazing to create new flavours, recipes, shapes... Just amazing. So I'm starting to publishing recipes here too or in another blog, I still don't know. I'm kinda afraid this blog gets a little bit confusing and a huge mess.

Just to give you some curiosity, just look at this beauty, it's soooo perfect. For those who do not know, for those who know and for the curious ones this is called Petit Gateau which is a small cake with melted chocolate.


Just decided, I'm going to make another blog for food recipes! Feel free to visit, learn and steal recipes! Here is the link : http://tofillthestomachandthespirit.blogspot.pt .

Have fun!

Paint your own clothes!

Today I just remembered that we can paint our clothes, is something different to do, kids love it, you can use your creativity and, when finished, you can give it as a present.
I painted some kitchen stuff , some towels, some t-shirts but I will only be able to show it in summer because I am in college and all my clothes are in Madeira, where my Mom lives. So I will show it later (if I remember =P).
So, I have some ideias, if you have a lot of time but you're not good at it or it's your first time and you don't wanna ruin it, i suggest you start with something like this, looks complicated but it's really simple, you just do some little balls and will get easier.

 If you are already a good artist and you love painting but you never tried painting on clothes or you tried but your creativity is down you can so things like this two.

If you want to paint but you think it's not enough you can do like this or add some buttons.


Painting like this is really simple,it is the easiest way, but you have to be carefull and put a cardboard in the middle of the t-shirt so you only paint the front part and not the back part too. Then you put some drops of paint in the t-shirt and fold in half, pass your hand to make sure the paint adhered to the fabric and unfold it. Let it dry and follow the instructions on the paint tube.


As I said, kids love it, my cousin (6 years) loves to paint, she painted one pijama and some t-shirts. Help them so they don't put to much ink or too much water but they can do the rest. =)